

Tutorial : how to render with showcase pro

Tutorial : how to render with showcase pro
Step 1:
open Showcase Pro
1-click on folder
2-click on your file
Step 2:
1-Choose your supported file type (AutoCAD drawing (.dwg)
Autodesk 3D scene (.a3s)
Autodesk Alias (.wire)
Autodesk Inventor (.iam, .ipt)
Autodesk Packet (.apf)
CATIA V4 (.dlv, .dlv3, .dlv4, .exp, .mdl, .model, .session)
CATIA V5, incl. R20 (.catpart, .catproduct, .cgr)
Cosmo scene (.csb)
DXF (.dxf)
DirectModel JT (.jt)
FBX (.fbx)
Granite (.g)
IGES (.iges, .igs)
NX, incl. V7/7.5 (.prt)
Open Inventor (.iv)
Pro/Engineer,Creo (.asm, .prt)
STEP (.step, .stp)
SolidWorks (.sldasm, .sldprt)
Stereolithography (.stl, .stla, .stlb)
2-click open
Step 3:
1-click on Lighting Environements & Backgroud
2-choose your Backgroud
3-click Library
4-choose your Environements from Library
Step 4:
1-click on Adjust Lighting
2- edit your Light & shadow Setup
Step 5:
1-click on Visual styles
2-choose your Visual styles
3-click Library
choose your Visual styles from Library
Step 6:
1-click on Look
2- click on Shots
3- choose your shots
Step 7:
1-click on Look
2- click on Materials
Step 8:
1- select part to add material
2- right click in maerial and click assign to sélection
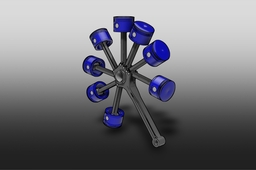
Step 9:

Step 10:
1-click on Publish
2-click on Image
Step 11:
1-choose Localy only
2- publish Image(s)...
Step 12:


